Since school started last week, my students and I have been focusing on different ways to visualize text: anchor charts, book maps, and related videos. These are great year-round strategies that work for most content areas, but acting out plays is a favorite ELA-specific strategy for visualizing text. This strategy is great for drama units, including The Crucible, Raisin in the Sun, and Shakespeare’s works. I am not a drama teacher, nor was I a drama kid in school. However, when teaching a play in class, I firmly believe in “acting” out the play. Here’s why and how.
This post this post may contain affiliate links. Please read the Terms of Use.
Stage Philosophy: Why We “Act” in ELA
1. Firstly, plays were meant to be performed, and students are not getting the full effect just reading the words or having the words read to them.
2. Plays are interactive, and students better engage the text when we “act.”
3. In addition, including some simple props and staging helps students visualize and better comprehend the world of the play.
4. Basic staging helps students see and experience domain-specific vocabulary like “soliloquy” or “aside.” Here’s some specific vocabulary activities I use when teaching Shakespeare’s works: volume 1 and volume 2.
5. It’s fun! Students are significantly more engaged in each play when we act it out.
Facilitating Plays in ELA
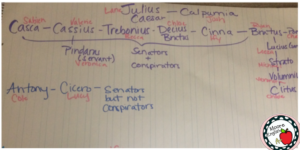
1. Cast the play. Since plays often have a complicated cast of characters, I almost always begin each play by creating a “family tree” on the board with chart paper. This helps students visualize the relationships between characters. I leave the chart up for the duration of the play, and students reference it frequently. Students also stick with one character (or two if the part is small) for the entire play so their peers begin to associate one student with one character.
I let students volunteer for parts first, but before we begin, I will discreetly (during bell work) approach my most timid or struggling readers and tell them what’s about to happen and make some suggestions about which characters they might choose. Then I call on that student first, so he or she can be involved in the play without stressing about their oral/aural reading skills and/or their stage fright.
Pro-tip: Choose one student to be the all-purpose stand in so when other students are absent, you don’t have to scramble for someone to fill the gap.
2. Ask for buy in. I explain up front that the process of acting out the play is much better if everyone engages. I put on my most excited face and, usually, that’s contagious for students.
3. Keep the audience accountable. While students are “acting” the play, the audience has to be kept accountable. This helps manage behavior and increases student comprehension. For my students, we annotate the play as we read. Each class establishes its own expectations for what annotation should look like. But it usually averages out to 3-5 annotations per page. You could also keep the audience accountable with quizzes, worksheets, or random audience questioning. Here are some analysis quizzes I use with The Crucible.
4. Stage the play. This is the most important part of “acting” out the play. Arrange your room so you have an area for students to actually “perform.” For me, this means clear a space at the center of the room, and when a student’s character is on stage, that student steps into the circle. I do this even when a character is on stage but not speaking. This helps students to visualize the setting. The only time the students on stage sit is when their character sits. This process actually has little to do with acting and more to do with visualizing.
5. “Cut” often. As we read, I stop students frequently to check for understanding, analyze character motives, make inferences and predictions, challenge their understanding of figurative or literary devices, explain confusing or unfamiliar allusions, use context clues, or clear up frequent misconceptions. Here’s an abridged and modified version of Romeo and Juliet I use to differentiate with students.
How do you know when to “cut”? After you’ve taught a play a few times, you have a pretty good idea of what items are going to confuse students. For example, I’ve taught The Crucible often enough to know that we have to stop and discuss the meaning of the word “lechery.” Or, during Julius Caesar, we have to stop and clear up the Phillipia/Sardis geography in Acts IV and V.
However, if you’re on your first time teaching a play, start by looking at the formative and summative assessments. What questions appear on your assessments? Where would you need to stop in order to make sure students understand the play well enough to succeed on the assessment? Ultimately, stopping once every page or so is a good rule of thumb. I noticed myself stopping students more often during Shakespearean plays than during American or contemporary plays.
Bonus: Props help! I know not everyone can afford or acquire props, but some basic props help a ton. For example, having some card stock on hand during The Crucible is great because then my John Proctor can rip the card stock; this helps students connect the two parallel scenes. I also have a creepy poppet for The Crucible. During Julius Caesar, I provide the title actor with a bright yellow bed sheet to use as a toga; not only does my Caesar usually love the notoriety of wearing this item, but it becomes really helpful when Antony holds up Caesar’s toga for the crowd. We also use foam swords for his death scene. Most of the “props” we use in class came from garage sales or as hand-me-downs from other teachers. Bottom line: props are not essential, but they do help students better visualize the action of the play.
Check out these resources for teaching drama in the classroom!
- The Crucible Assessment Bundle
- Visualizing Shakespeare Bundle
- Macbeth and Hamlet listening guides
- Abridged and Modified Romeo and Juliet and listening guide


Photo by Hulki Okan Tabak on Unsplash


