Last week, I shared a peek into my lesson plan book and described the process I use for lesson planning. In an effort to meet my school’s requirements for lesson plans and my lesson planning needs, I created my own lesson plan template in Google Sheets. When I set out to create my template, here’s what I wanted to do:
- contain all my lesson plans for a term in one file
- see an entire day without having to scroll left to right
- be able to efficiently type in my plans without having to continually refer to standards documents
- be as detailed as possible in my lesson plans (so future me would not be left confused) but to also be responsible with my time
Here’s how to use drop-down menus to meet these goals:
This post this post may contain affiliate links. Please read the Terms of Use.
Creating a Template
Since I wanted all my lesson plans in one file, I first had to choose a platform: Google Docs, Slides, or Sheets. Ultimately, I chose Sheets so each week of plans would be one tab.
Then, I had to create a template that included all the nerdy items I wanted to include without taking up too much space. Remember, I did not want to have to scroll left to right! I do not think this is a surprise, but I am detail oriented, so here are all the things I wanted to include in my plans:
- date, block, unit name (requirements from the admin team)
- bell work and description
- standards, essential questions, and learning targets (because I want to see that the EQ matches the standard and matches the LT)
- a description of the lesson activity, instructional strategies, and technology use (requirements but also a practice that makes me more intentional)
- nerd stuff: Bloom’s Level, Depth of Knowledge, Rigor and Relevance Quadrants, Marzano Strategies, Keys to Comprehension, and Facets of Understanding. Read more about why I included these here.
- formative and summative assessments
Ultimately, here’s what I ended up with:

Creating Drop-Down Menus
While my lesson plans are detailed, I also wanted to keep the process efficient. For this reason, I added drop-down menus to my plans. Here are the steps to follow:
First, create your template in one tab of a Google Sheets. This process took me a while, but the payoff was worth it! The menus need homes, so the template has to be in place first.
Then, in a separate tab, create your drop-down menus. Create menus for standards, learning targets, unit names, essential questions, common formative and summative assessments, bell work modules, etc. This can also be time consuming, but once it’s done, you just have to make updates and tweaks each year. Here’s all the menus I created:

After Creating Drop-Down Menus
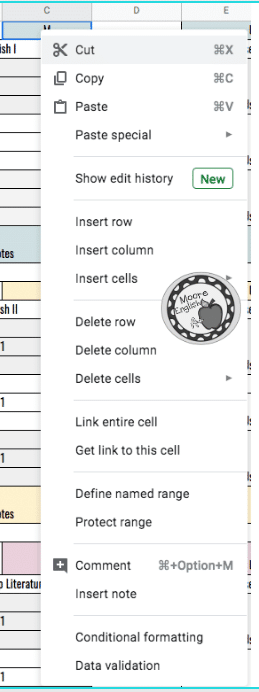
Now, go back to your original tab. Decide which menu you want to add first. Right click on the box where you want to add the drop-down. At the bottom of the menu, you will find Data Validation. Click Data Validation.
After you click Data Validation, a box will pop up for Data Validation. Focus on the box outlined in blue and choose the four-square window. This is where you will choose the range of boxes that will populate the menu. Click the four-square window.

When you click the four-square window, another box will appear. This one will ask you to select a data range.
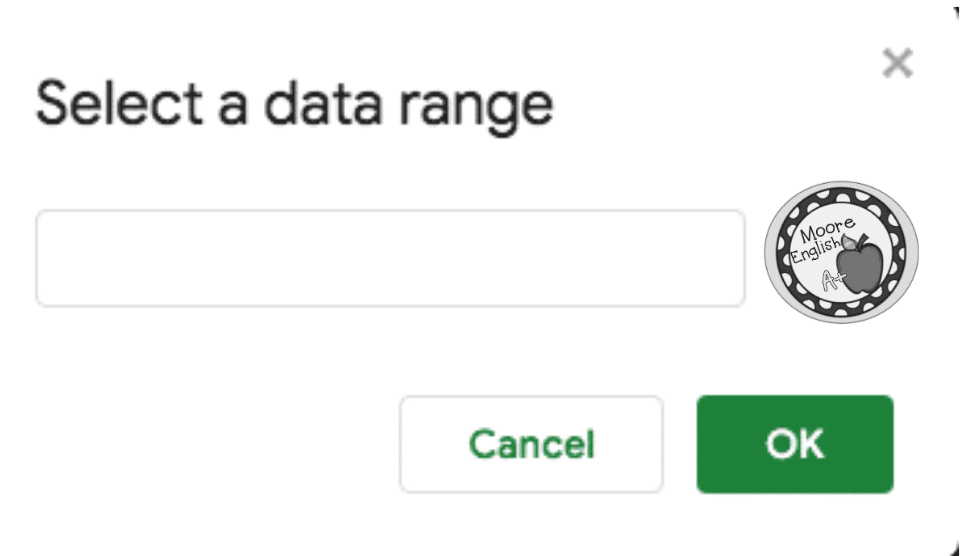
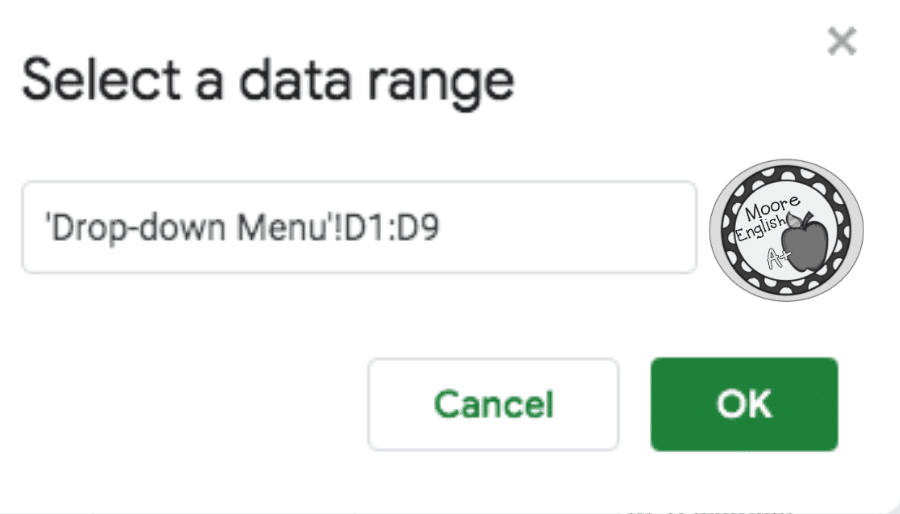
In order to select a data range, go to the tab where you recorded your lists. Select the data range you would like to put in this drop-down menu. When you do that, the data range information will appear in the box. It will look like this:
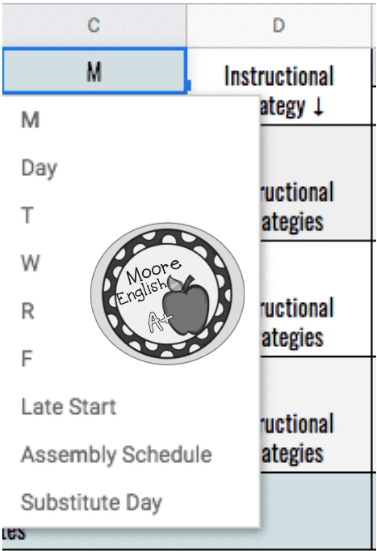
Once you press okay, you will have created a menu like this one. Each box on the template that has a drop-down will have a small arrow on the square. Add the drop downs to the rest of the template, and you will be good to go. The first time you create this kind of lesson plan, it will take some time. However, the ability to create detailed lesson plans efficiently is worth it in the end.
Final Thoughts
Lesson planning is one of the realities and obligations of being a teacher. Whether you plan on paper or online, make the process a meaningful one. A copy of my lesson plan template is here. Follow the link, make a copy, and you can start adding menus today. Once the template is in your drive, you can begin customizing. Let me know how this works for you!
Check out more ideas for instructional planning here!

Photos by Ivory Mix, The Content Bar, Stock Boutique, and Pixistock


