We remember 90% of what we teach, so several times this year, I have my students do the teaching through Collaborative Google Slides. When I give the students the podium, they feel empowered and take greater ownership of the content, recognizing that they are responsible for how their classmates will learn the material.
This post this post may contain affiliate links. Please read the Terms of Use.
Tips for Facilitating Students as Teachers:
In my AP Literature class, one of our early collaborative presentations asks students to “teach” their classmates about famous allusions. Here are the steps I use to facilitate students as teachers:
- Plan ahead. Every time I decide to make the students the teachers, I outline exactly what lessons they will teach, the requirements for successful teaching, and a specific description of how they will teach. In the case of our allusions project, requirements included the number of allusions, word count, use of an image, and speaking time.
- Offer work time. When I know students were going to be teaching, I schedule some class time for them to work. This provides them time to do some research, figure out how to incorporate technology (more below), and to ask any questions.
- Use Google Slides collaboratively: I will explain the steps for creating a collaborative slideshow below. But suffice to say that this helps save class time. Nothing wastes time like having each student go up to the board, login to their account, inevitably reset their password, log back in, forget where they left the file. And then the bell rings. An alternative to Google Slides is Google Jamboard.
- Engage the audience: Establish some kind of expectation for how the audience should behave when other students are “teaching.” I often require students to each ask a certain number of questions. For more elaborate teaching experiences, I have had students develop their own worksheets for their classmates. Regardless of which system you use, find a way to keep the audience engaged, listening, and accountable. Get more ideas for teaching speaking and listening here.
How to Use Google Slides Collaboratively:
1. Create a Google Slides presentation. After the title slide, include a list of specific instructions so students can continually reference back to the expectations.
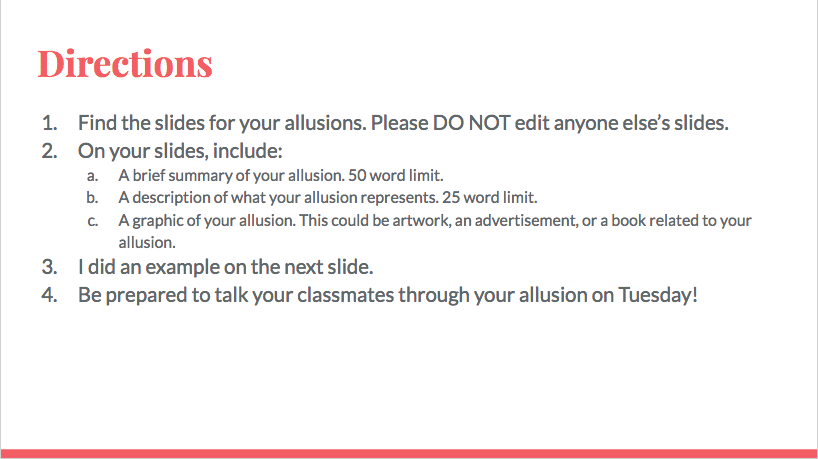
2. Add a slide for each item that needs to be “taught.” Sometimes I assign specific students to specific concepts or ideas, but other times I let students self select. Either way, make sure each component has its own labeled slide and that the slides are in the appropriate order. Yes, this takes some work up front from me, but that pays off in the end.
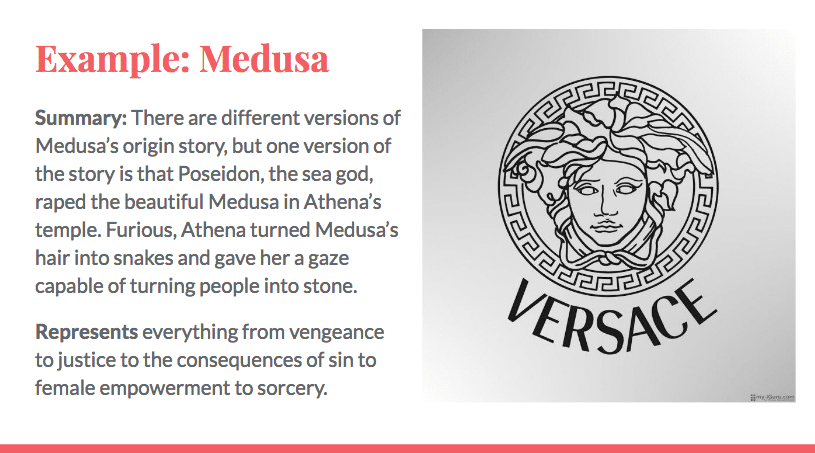
3. Next, create an example slide so students can visualize expectations.
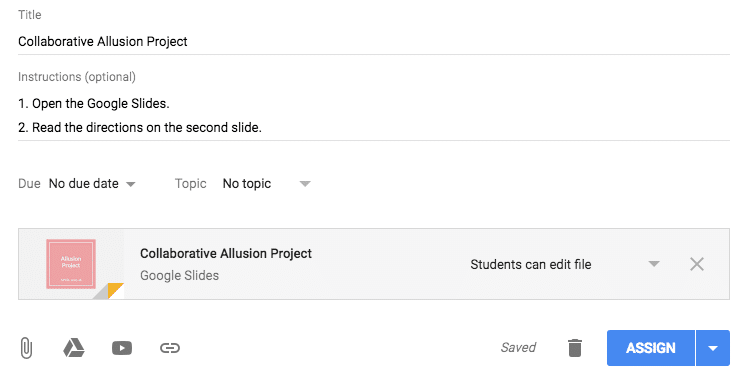
4. Then, share the slideshow with your students. Because I use Google Classroom, this means I create an assignment, attach the slideshow, and adjust the settings so students can edit the slideshow. If you don’t use Google Classroom, just click the blue share button and add students’ emails.
5. When explaining the assignment to students, discuss the expectations for how to function in a shared environment. Make clear the consequences for editing someone else’s work. Show students how the revision history in Google Slides allows anyone to see who edited what and when.
I am attaching a copy of one of my class’ collaborative Google Slides here. When you click, a new window or tab should open. You will have to make a copy and add it to your Google Drive. The only information included is on the first three slides. Everything else in this slideshow came from my students! On Thursday, I will share another set of collaborative slides and a way to use collaborative slides to enhance annotation.

That’s the power of collaboration. 😉

Icons from Icons8

